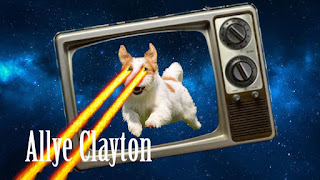
Adobe Photoshop & InDesign - Laser Pets
Class is never boring here! We got to build a laser pet in Photoshop and a business card in InDesign.
I'll take you through my step-by-step process you, too, can build your own laser pet!
1) I took a basic galaxy backdrop and threw it into Photoshop - This is your background
2) In another Photoshop tab, I found an old tv set. With the selection tool, I selected the parts of the tv I wanted to keep. Next, take your mouse tool, should be the first tool with a mouse and arrows, grab your tv set and hover it over the tab with your galaxy background. Don't release it until your tabs switch over! This tv will be a new layer.
3) We're going to repeat the last step but with an animal instead. Once you've got your pet all set, drag him over to your background tab. The pet will be another layer.
4) Finally, we're going to add lasers! I went to Google and found a png file with lasers. A png file will allow you to simply drag the item over. So, I've eliminated a couple of steps for you! Drag this final layer over to your pet! If you need to transform the lasers to fit you can hit, CMD + T. This allows you to make it bigger or smaller.
5) There you go! You have your own laser pet!


Comments
Post a Comment